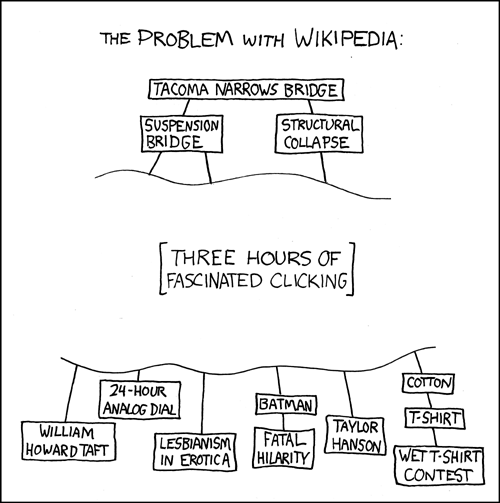
Where would we be without Wikipedia? It’s hard to believe how we survived without this icon of the Internet. A novel idea of being an encyclopedia that anyone can edit, it’s always kinda interesting how you can look up an article about one thing and then end up somewhere completely different as you jump from article to article by clicking through its link-heavy content. But more important than that, Wikipedia is the authoritative mediating source of arbitration in all Internet arguments where the combatants usually don’t have anything other than extremely biased and inflammatory blogs as source material at hand and are too lazy to do their own research using actual respectable academic sources.
I’ve even heard that this spills over into the “real world.” Wikipedia has reported that it sees a huge spike in traffic coming in on mobile devices on Friday and Saturday nights and the underlying cause of this is believed to be attempts to settle disagreements than break out from drunken arguments in bars.
So, all things considered Wikipedia usually has a good base on information just about any subject under the sun. And it got me thinking that a lot of websites and applications could benefit greatly from having an easy way to pull data from Wikipedia and use it to populate content. Fortunately, Wikipedia is built on some software that does provide an API for doing this. I remember seeing the super-slick Google Chrome experiment 100,000 stars put out by the folks at Google used Wikipedia excerpts as a brief description of each star. So I thought I’d look into the process of pulling data from Wikipedia using JavaScript and write it down because I figure someone else would find it useful at some point. Because other wikis are built upon the same foundation as Wikipedia, itself, this is not limited to getting data from Wikipedia alone. You can query other Wikis as well.
Read More »
One of the most useful implementations of software design patterns is the “PubSub” pattern. “PubSub” is a shorthand term for “Publish-Subscribe” which is a description of what the pattern is actually doing. The reason it is so useful is because it is so universal to how applications work. Basically the idea is that you have pieces of code (publishers) that say “something happened” — a user logged in, there was an error retrieving data, a button was clicked — it could be anything. Then you have pieces of code (subscribers) that run when those events occur. They are called subscribers because they subscribe to the event that gets published. PubSub implementations will also have some sort of capability for previously set subscribers to unsubscribe from an event. If that event happens again after this, the subscriber code will no longer execute.
Sometimes the terms used in PubSub pattern can vary. Sometimes “subscribers” are referred to as “listeners” because they “listen” for certain events occurring. You might recognize this in things like JavaScript’s addEventListener where you can attach callback functions to run when certain DOM events (such as button clicks and mouse hovers) occur. jQuery’s on, off, and trigger methods, are 3 methods that you can use in tandem to easily implemennt PubSub, with “on” being the subscribe functionality, “off” being unsubscribe, and “trigger” being the publish functionality. Backbone.js also uses on, off and trigger in its eventing system. Whatever the terms are and however the code is structured, ultimately these are just variations of the PubSub pattern and will nearly always follow similar ideas and principles.
A lot of examples of PubSub will use something that is pre-built, like jQuery’s methods mentioned above, or a library that implements it, but what we’re going to do in the following paragraphs is look at a raw JavaScript implementation of PubSub where we can do brodcasting (publishing) of our own custom events and attach subscribers to these events. This will give us a good understanding of how PubSub works under the hood. Our implementation will be pretty simple and it will only handle custom events that we name ourselves, but it could be taken and expanded upon to include more standard universal events such as mouse events, load events, error events, and others.
Read More »
I love jQuery Isotope from Metafizzy. As a longtime fan of the Springfield Isotopes, who wouldn’t love an isotopes jQuery plugin? I’ve enjoyed it so much that I bought the developer license so I could use it for my own commercial applications and themes. It’s an outstanding plugin and a lot of the popular templates and themes on sites like Theme Forest use it to create things like filterable portfolios or display content in other dynamic ways.
The Isotope homepage is awesomely flashy and shows some slick implementations on how you can use the plugin. However, because there is a lot going on there on the page, I think there’s the potential that it might be a bit challenging for users who are new to jQuery to find the simplest way to use it in the code examples. There is a lot of styling and code to sift through. Perhaps, it comes down to a matter of personal preference, but I’m more of a fan of the “Start really simple and plain and then build up from there” approach. So I thought I’d show a really simple, very vanilla example of jQuery Isotope so that you can get it up and running in your own applications as soon as possible. You can add more complexity and styling from there if you so desire. The demo of what we’ll be creating and the corresponding download are below…
View Demo Download Files
We’ll be creating a filterable portfolio-style implementation using jQuery Isotope.
Read More »
In what follows, we are going to look at Backbone.js routers. Routers are a great place to start whenever you begin developing a Backbone application (or any application for that matter) because you can figure out what URLs and sections your app will need and add hooks in your code to respond to them. It helps define application structure, much like a flow chart would.
The files for demo and download for the following discussion can be found below if you’d like to follow along…
View Demo Download Files
Backbone.js uses routers to execute certain actions when a user goes to a certain URL within a Backbone application. Backbone applications all use routes that follow a # character in the URL. The # might be familiar to you if you’ve ever used it as a named anchor to link to part of the current document without going to a new URL. This is very prevalent in pages that have tables of content at the top (e.g. like in Wikipedia articles), where the links at the top take you to a place on the same page further down. That’s what’s going to happen with Backbone. We’re going to stay on our same page, but we’re going to set up our JavaScript such that Backbone listens for the user going to these links. When the user clicks on different links within the application, instead of going to a different place on the page, we’ll be executing different portions of JavaScript in our code. That’s how a “client-side JavaScript application” essentially behaves.
Read More »
The benefits of using something like RequireJS to asynchronously to load your project’s JavaScript was discussed previously. However, if you wish to load JavaScript in the more conventional way (that is, just sticking a script tag or tags in the browser) there are quick and lightweight ways to make this an efficient and viable option as well. These methods involve concatenating and compressing (minifying) your JavaScript files into one script file. At the end of the process you’ll only need to end up loading this one large script file (which is a lot quicker than loading numerous smaller scripts file) Additionally, if you concatenate your JavaScript files in a particular sequential order, you can easily make this a way to manage your dependencies… you just need to make sure that you load the dependency libraries before you load the libraries that require them. The tools we will look at in what follows makes this a fairly simple process.
To accomplish this in my workflow I use something called UglifyJS. It’s a simple package that runs in a Node.js environment. Node.js is a platform that allows you to run JavaScript system level applications on a server environment (or in this case, on our local machine). We can open our terminal and type something like “node myJavaScriptFile.js” and run some JavaScript we have written to do all kinds of neat stuff… all outside of the browser. So first things first, go and download and install Node.js if you haven’t already.
After that navigate to the directory where node is installed and run…
npm install uglify-js -g
nmp (which stands for Node Package Manager, is a way of quickly installing the latest version of Node applications). You may have seen this elsewhere with Python’s pip command or Ruby’s gems. The -g parameter stands for global, which will enable you to run UglifyJS from anywhere on your machine.
Now what you can do is simply run the command according to the following format in the directory where your JavaScript files are…
uglifyjs -o scripts.js javascript-file1.js javascript-file2.js javascript-file3.js
In the example above, javascript-file1.js, javascript-file2.js, and javascript-file3.js will all be concatenated and compressed into a file named scripts.js file in the order in which they were set. So following this convention, you can load your dependencies where they are important in your JavaScript projects. Backbone.js, for example, has a hard dependency on Underscore. So you’d want to add Underscore *before* you’d add Backbone if you were doing a Backbone project. Also, a lot of times developers like to have jQuery available to them in their Backbone models, collections and views. So we could add jQuery into our list of files as well resulting in something like the following…
uglifyjs -o scripts.js underscore.js jQuery.js backbone.js
** Note that all of these files (underscore.js, jQuery.js, backbone.js) have to exist within the directory that you’re running the command from. scripts.js will be created if it doesn’t exist and overwritten if it does.
But whatever JavaScript you decide you need to include, all you have to do once the UglifyJS build process is complete is load the scripts.js file in your HTML. You can name this file whatever you want (it doesn’t have to be scripts.js). What I usually do in my workflow is set up a .bat file (and call it build-js.bat or something) that has all of my files and their dependencies set in the order that I need them. Then when I need to deploy my JavaScript to production I just run the .bat file.
So whichever way you choose to do it (either using the asynchronous module definition (AMD) pattern using something like RequireJS or using a tool like UglifyJS or using another similar solution) there are definitely good ways to load your handle your project’s JavaScript JavaScript in an efficient and effective manner.